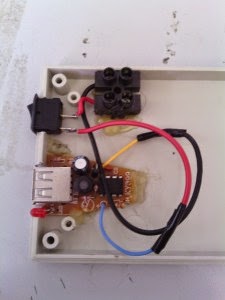
Eltronicschool. - There are many circuit schematic designed for power bank design and application and give the best result. One application of Power Bank circuit schematic is like look in Figure 1 below. This circuit schematic is Power Bank using 3.7V Li-ion Cells based on 555 IC and Transistors that has been publishing by Homemade Circuit Projects site on January 11th, 2016. You also can read: Circuit Schematic 12V LDO Solar Charge Controller using MOSFET)
In here we will give you review again with this circuit with give you again the circuit schematic Figure, component part, and description about this Power Bank using 3.7V Li-ion Cells based on 555 IC and Transistors. And the last we will give you link to you to read more this circuit and description from original source.
In here we will give you review again with this circuit with give you again the circuit schematic Figure, component part, and description about this Power Bank using 3.7V Li-ion Cells based on 555 IC and Transistors. And the last we will give you link to you to read more this circuit and description from original source.
Circuit schematic

Component Parts
- 555 IC
- Transistors
- Resistors
- Capacitors
- Rectifier Diodes
- Zener Diode
- Variable Resistors
Description
Circuit schematic like in figure 1 above is Circuit Schematic Power Bank using 3.7V Li-ion Cells based on 555 IC and Transistors. According Homemade Circuit Projects site describe that in order to correct the above situation and make sure that the 3.7V power bank is able to provide the required 4.2V at a consistent rate until the cellphone is completely charged at this level, a step up circuit becomes imperative.
Form circuit schematic above that the inductor L is made by using 5 turns of 22SWG super enameled copper wire over any suitable toroidal ferrite core. Two variable resistors (presets) included in the design, these are required to be optimally set for acquiring the most effective and efficient performance outcome from the boost charger circuit.
The voltage across "C" in this circuit is the output which is used for charging the external device, and in our case the voltage here must be fixed at around 5V. This circuit also includes a built-in 3.7V Li-ion charger circuit made up of a TIP122 emitter follower stage, a 5V zener diode and a small 6V/100mA incandescent bulb.
As long as the 3.7v cell charges through the transistor emitter lead, the series bulb remains illuminated and as the cell nears the full charge level, the illumination on the bulb becomes dimmer until finally it shuts off indicating a full charged 3.7V cell.
The 5V zener diode ensures that the emitter voltage of the TIP122 never exceeds the 5V range, which is further pulled down to around 4.3V by the associated series 1N4007 diode.
Another 1N4007 diodes can be seen connected with the base of the BC557 transistor, this configuration makes sure that the BC557 remains shut off disabling the 555 IC stage and boost converter stage during the charging phase of the cell.
The charging input is preferably obtained from any standard SMPS cell phone charger unit. So the above takes care of a power bank using a 3.7V cell, the AH level depends on the load specs, or the cellphone required to be charged, for smart phones the AH level should be preferably above 5000mAH.
And for more your information about Circuit Schematic Power Bank using 3.7V Li-ion Cells based on 555 IC and Transistors you can read it fully from original source using link here.